 |
||
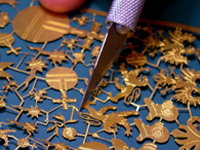
Making etched brass heraldic symbols |
|
|---|---|
Sometimes you will need to make tough drawings in order to add a perfect touch to your figure. They can be heraldic symbols or Ancient Greece and Rome motives which will need a firm line, a symmetrical drawing or an exhaustive detail whose realization will depend on the final touch. |
|
| Working with heraldic etched brass is very easy: |
|
Making a shield |
|
Firstly select a proper sized motif. Then remove it from the sheet. |
 |
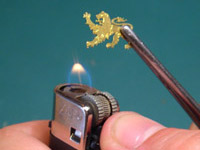
Secondly clean well the shield. Shields are not usually smooth, they are curved instead. So, you will fold the etched brass using a cylindrical element- like a pen. To do so, put the etched brass upside-down on your table and roll over your pen on it, pressing it well. Help yourself with your fingers or with the flame of a lighter and a par of tweezers |
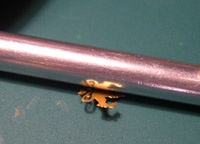 |
Help yourself with your fingers or with the flame of a lighter and a par of tweezers |
 |
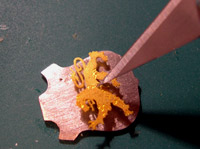
Once properly curved, just use cyanocrilate and then fix both pieces. Use some putty to fill any remaining hole so, by doing the exterior of the etched brass will be smoother . |
 |
Ready to paint! |
|
Making a flag or a banner |
|
Making a flag or a banner requires a very similar process. Firstly , you will have to make a flutter of your flag and then you will adapt the respective etched brass to that flutter. It is advisable to temper the metal sheet before so you will find it more ductile. |
|
Motifs on your figure´s clothes |
|
This process will be as identical as the one followed in flags. Help yourself with your own fingers or some non cutting object to adapt the etched brass to the outlines of the previously molded figure. Finally you will stick it. |
|
NIMIX. APARTADO DE CORREOS 45.117. MADRID 28080. (SPAIN)
TEL/FAX: 00-34-91 352 81 39